AIL BLINKIE

AIL STAFF
Mindy Mae

Customer Service and General Manager
Licensing Manager
Lisa

CT and Promotions Manager
Recruiting and Tubing Manager
Mindy Mae
Contests Manager
Lady Dragus

Copyright Violations
Dark
AIL DESIGNERS


January 30, 2013
Artwork Andy Lloyd
Available at Artistically Inclined Licensing
Tag: aDarkTag


CT Jan TAG 2
Tag: I ♥U
Artwork: Alexandra Adams aka Yuvirae
Tube available in Artistically inclined licensing soon
Tag By: aDarkTag


January 29, 2013

Here's a tag using the art of Tatyana Haustova which can be purchased at Artistically Inclined Licensing.
The tutorial to make this tag in Gimp can be found HERE

January 26, 2013

For this Tutorial I am using
This is a PTU Tube if you want to use this tube you can purchase itat
the Scrap kit
“Black Swan”
This was PTU but now FTU you can get his kit
from
You can use whatever mask you want too.
I am using “Monti's Circle”
You can find “HERE”
Filter you'll need
VM Natural
Lets get started …
Click on New Image (crlt +N)
800 x 800
Color white.
No worries you can re-size it once we are done.
I am using RD_paper 03
Copy and paste as new layer.
Go to layers
Load/Save Mask
Load Mask from Disk
Merge/Merge Group
Add RD_Paper 2
Add RD_Frame 06
Selections – Modify – Expand by 4
Selections – Invert
Highlight paper 2 - delete
Add Closeup
With Closeup highlighted - delete
Drop Shadow
Vertical: 3
Horizontal: -3
Opacity:100
Blur: 7.00
Add Tube
Add RD_Present
Re-size 75%
Adjust/Sharpen
Sharpen
Merge everything expect for the
RD_Present we are going to animated it.
Now new layer and add you copyright info. and your name.
For your name you can use whatever you want.
Animation
In PSP
Highlight the RD_Present
Effects – VM Natural
Sparkle – Set Max Size to 15%
Click OK
Copy Merged
Animation Shop
Paste as a New Animation (ctrl + v)
In PSP
Back Arrow
Effects – VM Natural
Sparkle – Set Max Size to 15%
Click Random – OK
Copy Merged
Animation Shop
Paste after Current Frame (shift + crtl + L)
In PSP
Back Arrow
Effects – VM Natural
Sparkle – Set Max Size to 15%
Click Random – OK

Copy Merged
Animation Shop
Paste after Current Frame (shift + crtl + L)
Crtl + A
Alt + Enter
Set Frames at 25%

Save as a GIF.
That is it, hope you enjoyed it ,
would love to see what you came up with. ♥


January 25, 2013

January 23, 2013
LadyDragus made this cute cluster frame out of
Annaica's Place Love isn't ColorBlind scrap kit

You can download this off her blog here

I used the wonderful scrap kit
love isn't colorblind to make these snags
You can download them on LadyDragus's
Blog here LadyDragus
January 22, 2013

Check out this new kit from Annaica's Place- it is now available to purchase at Artistically Inclined Licensing, just click HERE!
January 21, 2013

For this Tutorial I am
using
This is a PTU Tube if
you want to use this tube you can purchase it at
You can find a set of
Music Notes by Google or Yahoo
Image Search.
You will need Filters
AAA Frames/Foto Frame
and
DSB Flux/Bright Noise
Lets get started …
Open New Image 600 x
250
Resolution: 72.000
Transparent
Pick a light & dark
color from your tube
Light – Foreground
Dark – Background
Angle – 0
Repeat – 0
Invert – unchecked
Style – Linear

Add tube re-size if
needed
Move to left side
X out of this tube for
now
now add the Cello move
to right
Blend Mode –
Luminance (Legacy)
Opacity: 62%
Merge Visble
Add Notes re-size if
need
Open the Left tube back
up
Make sure it is above
the Music Notes
All Drop Shadow on all
Vertical: 3
Horizontal: -2
Opacity75
Blur 5.00

Adjust/Sharpness
Sharpen all
Top Tube
Selections – Select
All
Image – Crop to
Selections
Highlight Background
Selections – Select
All
Image – Crop to
Selections
Keeping Your
Background Highlighted
Effects – AAA
Frame/Foto Frame
Width size 6
Now new layer and add
you copyright info. and your name.
For your name you can
use whatever you want.
Now
lets animated the Music Notes
Effects
– DSB Flux/Bright Noise
Intensity:
45 – Mix
Copy
Merged
Open
Animation Shop
Paste
as new animation
Back
in PSP
Now
lets animated the Music Notes
Effects
– DSB Flux/Bright Noise
Intensity:
45 – Mix
Copy
Merged
Back
to AS
Click
first frame – paste after current frame shift+ctrl+L
Back
in PSP
Now
lets animated the Music Notes
Effects
– DSB Flux/Bright Noise
Intensity:
45 – Mix
Copy
Merged
Back
to AS
Click
first frame – paste after current frame shift+ctrl+L
Save
as a gif.
That is it, hope you
enjoyed it ,
would love to see what
you came up with. ♥


January 19, 2013

New personal use kit called Sew Me A Garden is available for you to purchase at Artistically Inclined Licensing. Just click here!


January 18, 2013
Got a new kit called An Evening of Romance! :) It was made to match all those Valentine's Day tubes out there, and compliments them beautifully! It has 67 elements and 14 papers, and is jam packed full with many unique items! Tagger size, personal use only, S4H okay.
(click on the preview to find it in the store)

January 17, 2013


For this Tutorial I am using the work of
If using these tubes make sure you have the proper licenses.
You can purchase her work from
I am using the FTU Scrap kit “Lovers”
you can find this kit at
You will need no Filters
Lets get started …
I have picked paper 1
Copy and Paste as new image
is highlighted
promote background paper to raster
Open up Frame 5
Copy – Paste as new layer
re-size 75% twice
Highlight frame
Click inside frame with your Magic Wand
Selections-Modify-Expand by 2
Invert
Highlight Paper - Delete
Add your Tube inside the frame
re-size if needed
Tube highlighted - delete
Drop Shadow
V: -2 H: 2 Opacity: 50 Blur: 5.00
Merge – Merge Visble
Now add your extras if going to use the Butterflies
re-size to 500
Use flower 5 behind Framed Couple
Free Rotate - left – All Layers unchecked
Duplicate – Mirror merge down
Duplicate move a little above the frame.
Merge Visble.
Adjust – Sharpness – Sharpen
Now new layer and add you copyright info. and your name.
To get the effect of the name
Adjust - Add/Remove Noise
Add Noise – Gaussian -Noise 75%
Monochrome checked
Merge/Merge Visible
Save as a Png.
Would love to see your results.


January 16, 2013

January 12, 2013
January 11, 2013

January 10, 2013

New kit available
January 8, 2013
LadyDragus made some wonderful snags Using one of our newest's Scrap kit makers
Annaica's Place

You can download them on LadyDragus's Blog
Here LadyDragus Blog
January 7, 2013

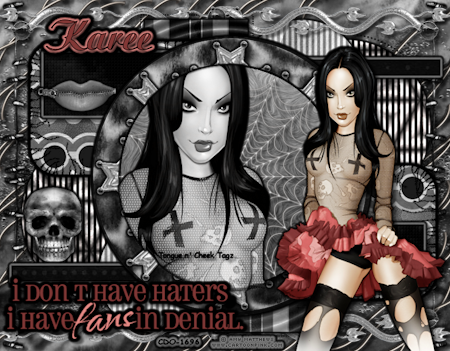
New Tag FaeryMist
artwork by William Rumley

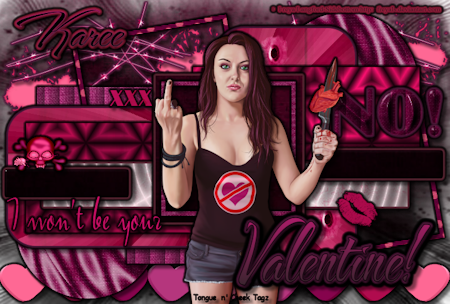
I've made a tag with the awesome artwork of Freya Langford-Sidebottom. This tube is perfect for all the anti-Valentine's Day tags!

And here are some snags:


January 6, 2013

For this Tutorial I am
using the artwork of
This is a “PTU”
Image
If using this tube make
sure you have the proper licenses.
You can purchase it
from
You will need the
Filters
Xero and Alien Skin
Xenofex 2
Lets get started ...
Open 600 x 250 image
Pick 2 colors
Foreground Light
Background Dark
Gradient
Angle: 0
Repeats: 0
Style:Linear
Flood Fill with your
Gradient
Add your tubes re-size
if needed
Closeup an on the right
Opacity Drop too 32%
Inner Bevel
Bevel
Bevel-2
Width-10
Image
Smoothness-21
Depth-7
Ambience-
-37
Shininess- 21
Light
Color-
White
Angle-
3
Intensity-
51
Elevation-
51

Other tube to the left
Drop Shadow
V: -5 H: 5 Opacity:
75 Blur: 5.00

Highlight your
background
Effects
Xero/Fritillary
Granularity: 5
Aggression: 30
Tesselation: 10
Variation: 0
Effects -Edge Effects –
Enhance
Add new layer/ Flood
fill another color
Selections/Select
All/Contract by 2/Invent
Now deselect.
Drop Shadow
V: -5 H: 5 Opacity:
75 Blur: 5.00
Drop Shadow
V: 5 H: -5 Opacity:
75 Blur: 5.00
Now new layer and add
you copyright info. and your name.
Animation
Effects
Alien Skin Xenofex 2
Star Size (pixel) :
1.98
Size Variation: 50
Edge Star Density: 50
Over All Density: 9
Overdrive: 49
Twinkle Amount: 29
Twinkle Rotation: 45
Copy Merged or
ctrl+shift+c
Open Animation Shop
paste as new animation or ctrl+v
Back to PSP
Click back arrow
Effects
Alien Skin Xenofex 2
Click Random Seed - ok
Copy Merged or
ctrl+shift+c
Back to Animation shop
Paste after current
frame or shift+ctrl+L
Back to PSP
Click back arrow
Effects
Alien Skin Xenofex 2
Click Random Seed –
ok
Copy Merged or
ctrl+shift+c
Back to Animation shop
Paste after current
frame or shift+ctrl+L
Back to PSP
Click back arrow
Effects
Alien Skin Xenofex 2
Click Random Seed –
ok
Keep frame properties
at 10 and save.
Would love to see your
results.


Subscribe to:
Posts
(Atom)